Firebase
Here is a step-by-step guide on how to set up your Firebase project, complete with images and descriptions.
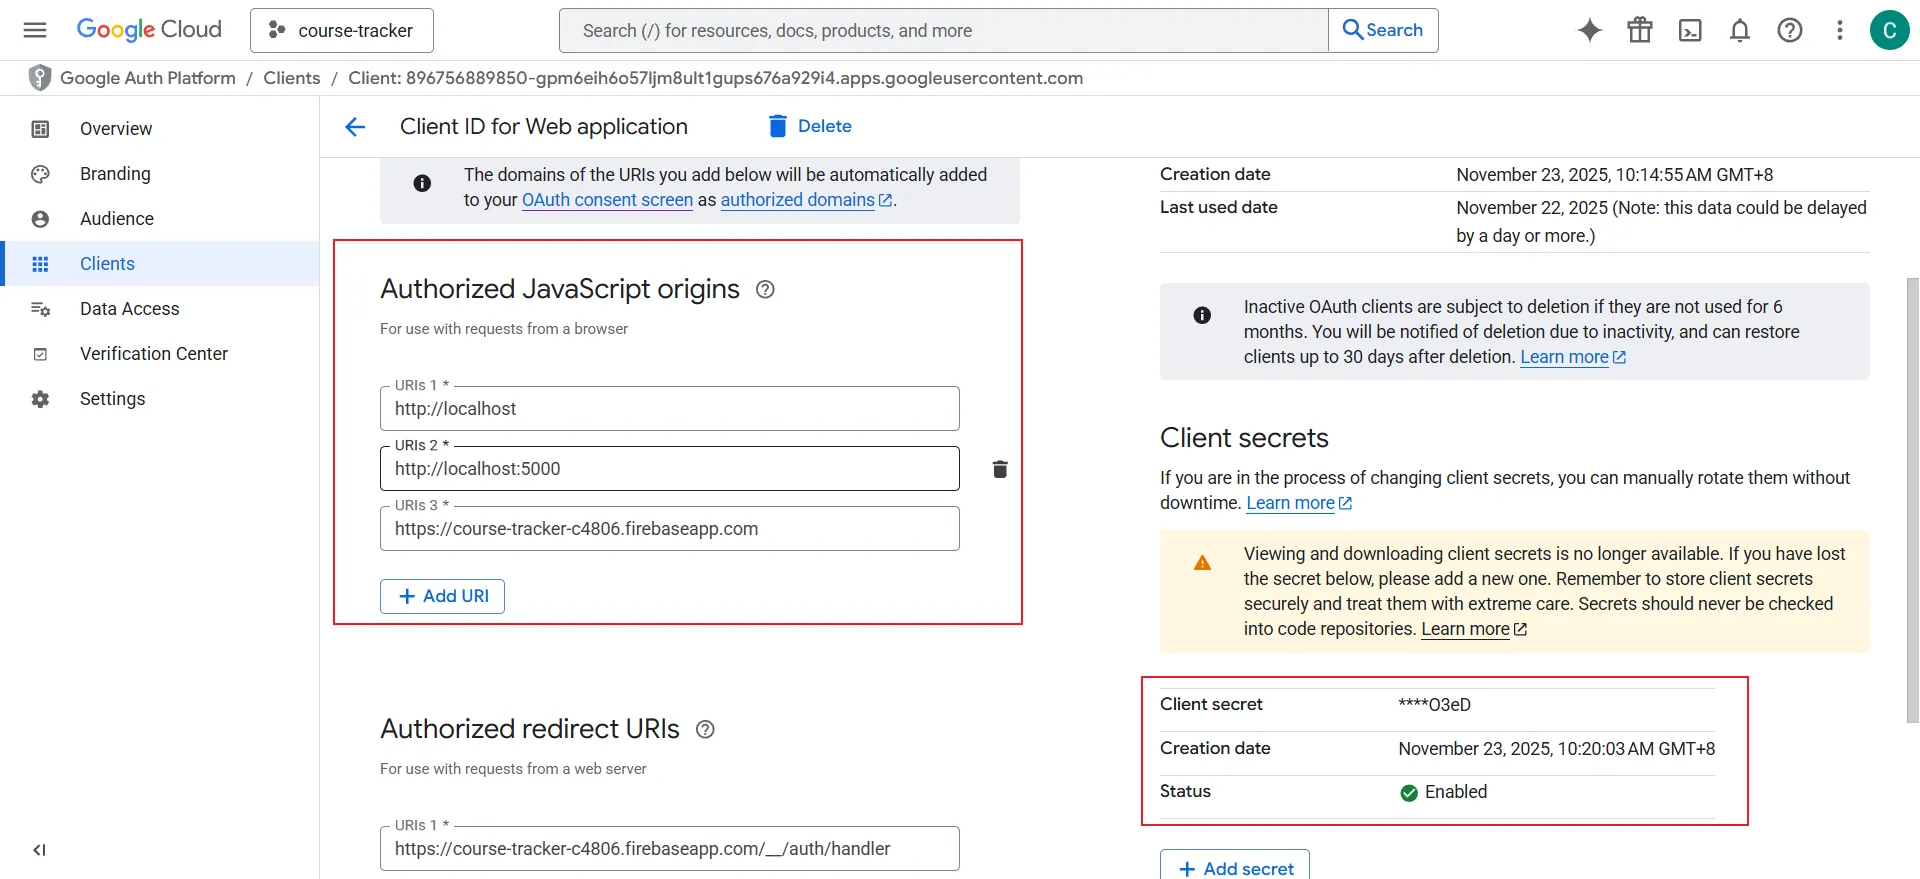
1. Setup the clientId and keys
The first step is to locate your project's configuration details, including your clientId and API keys. These are essential for connecting your application to Firebase services. You can find them in your project settings in the Firebase console.
In your Firebase project settings, you can find your Web API Key and under the "Your apps" section, you'll see the clientId for each app you've added.
Follow this link:
2. Enable Google login
To allow users to sign in to your application using their Google accounts, you need to enable the Google sign-in provider in the Firebase Authentication settings.
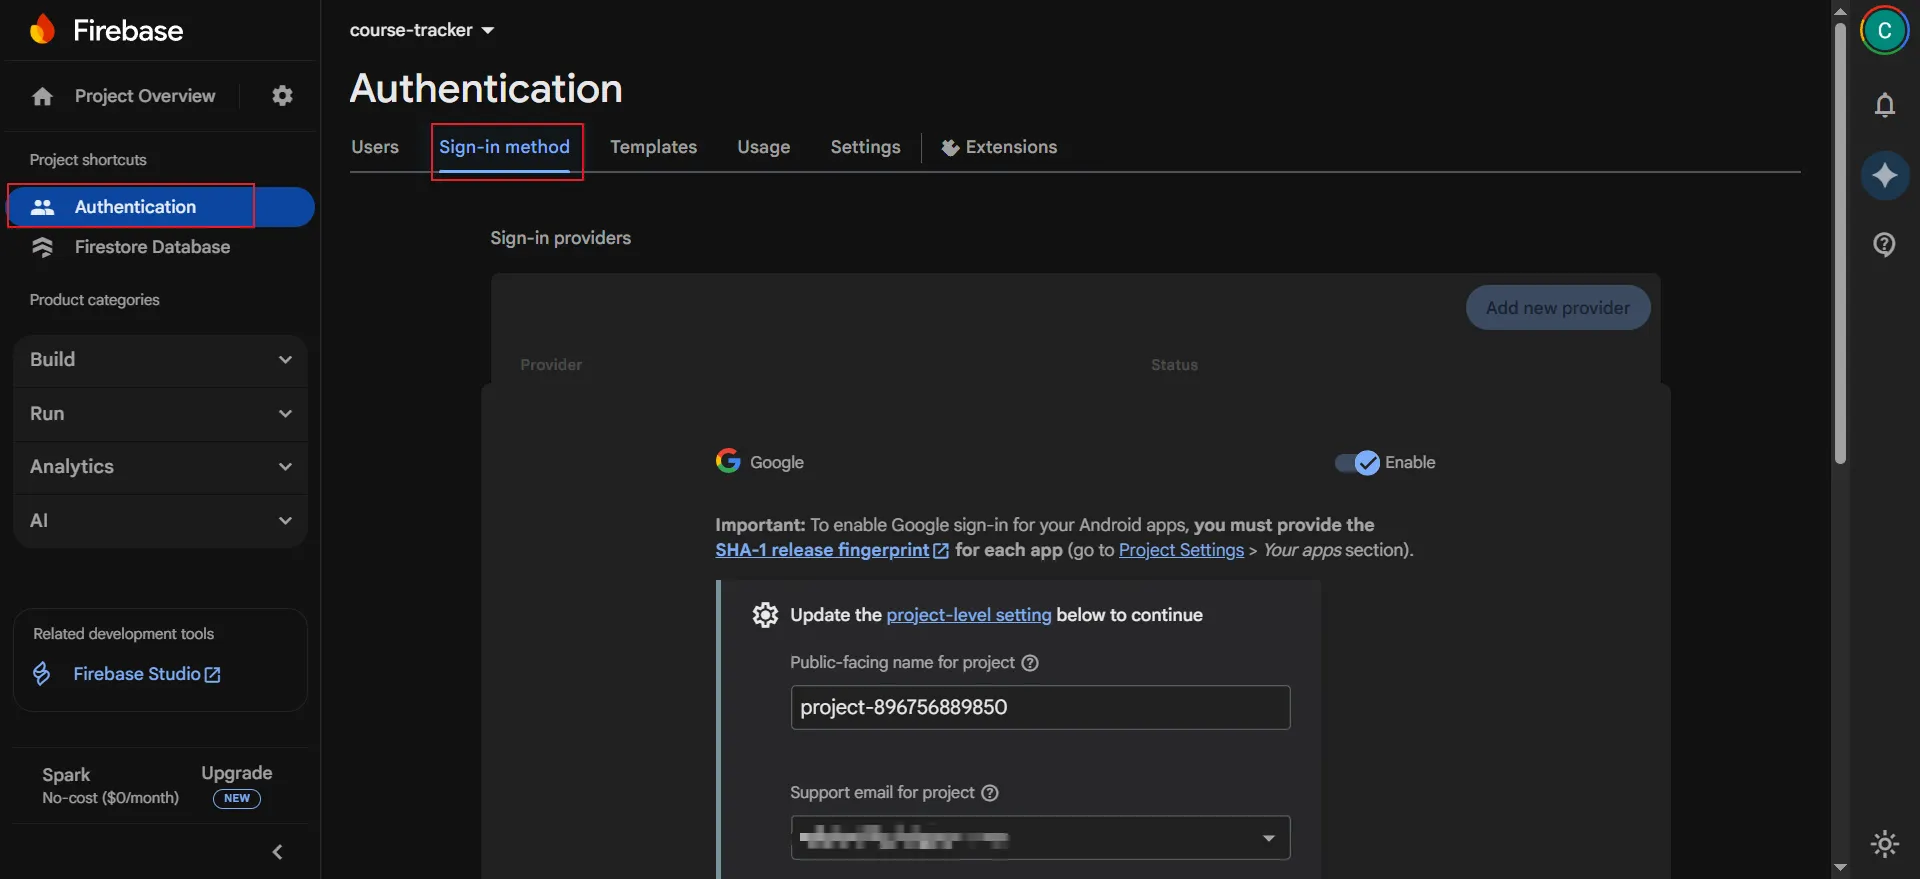
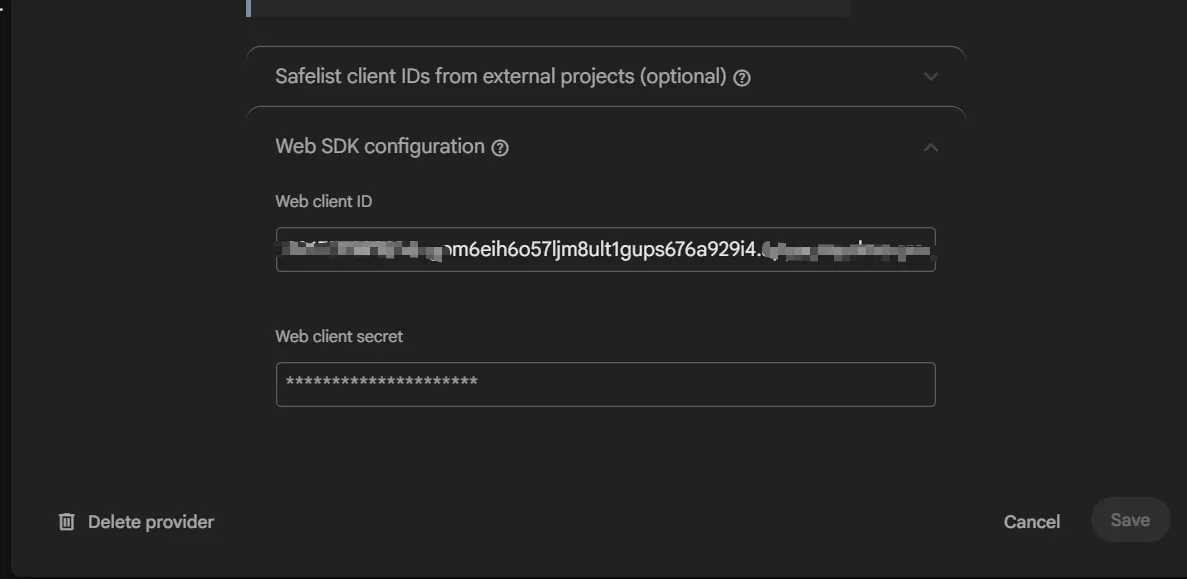
also need Web client ID and WEB client secret, you can get it from first step.
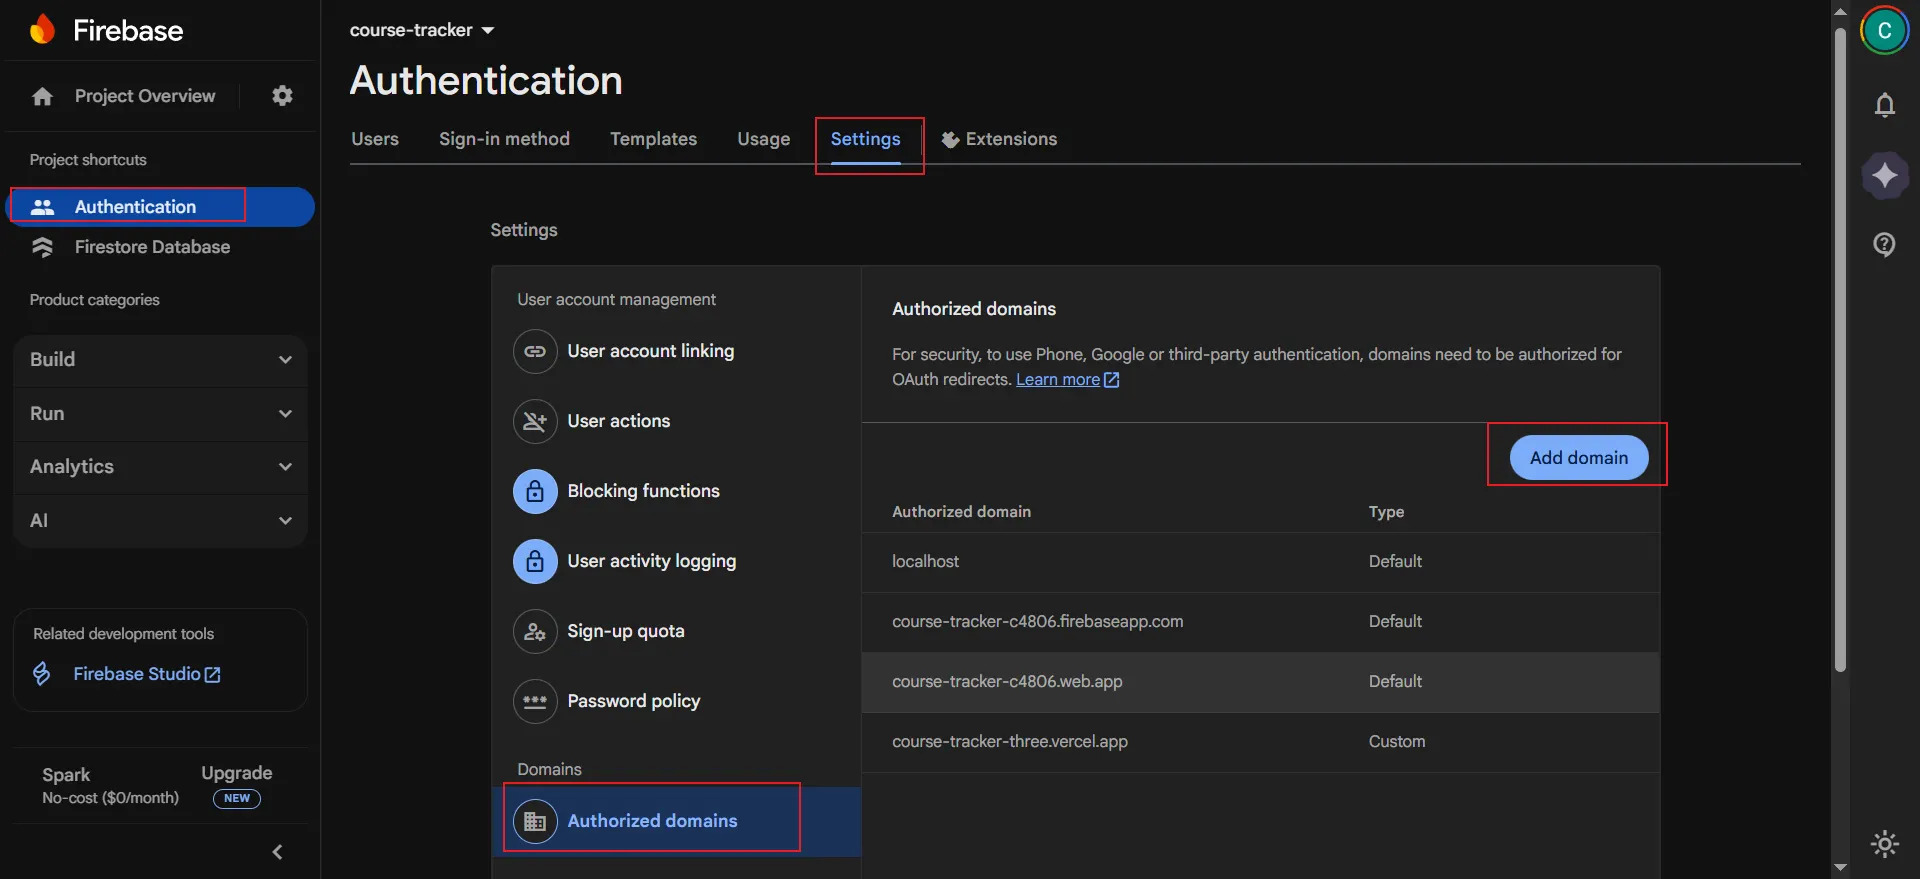
3. Add domain to login
For security reasons, Firebase only allows sign-ins from domains that you explicitly authorize. You need to add the domain where your application is hosted to the list of authorized domains.
Still in the "Sign-in method" tab of the Authentication section, scroll down to "Authorized domains" and click "Add domain" to enter your application's domain.
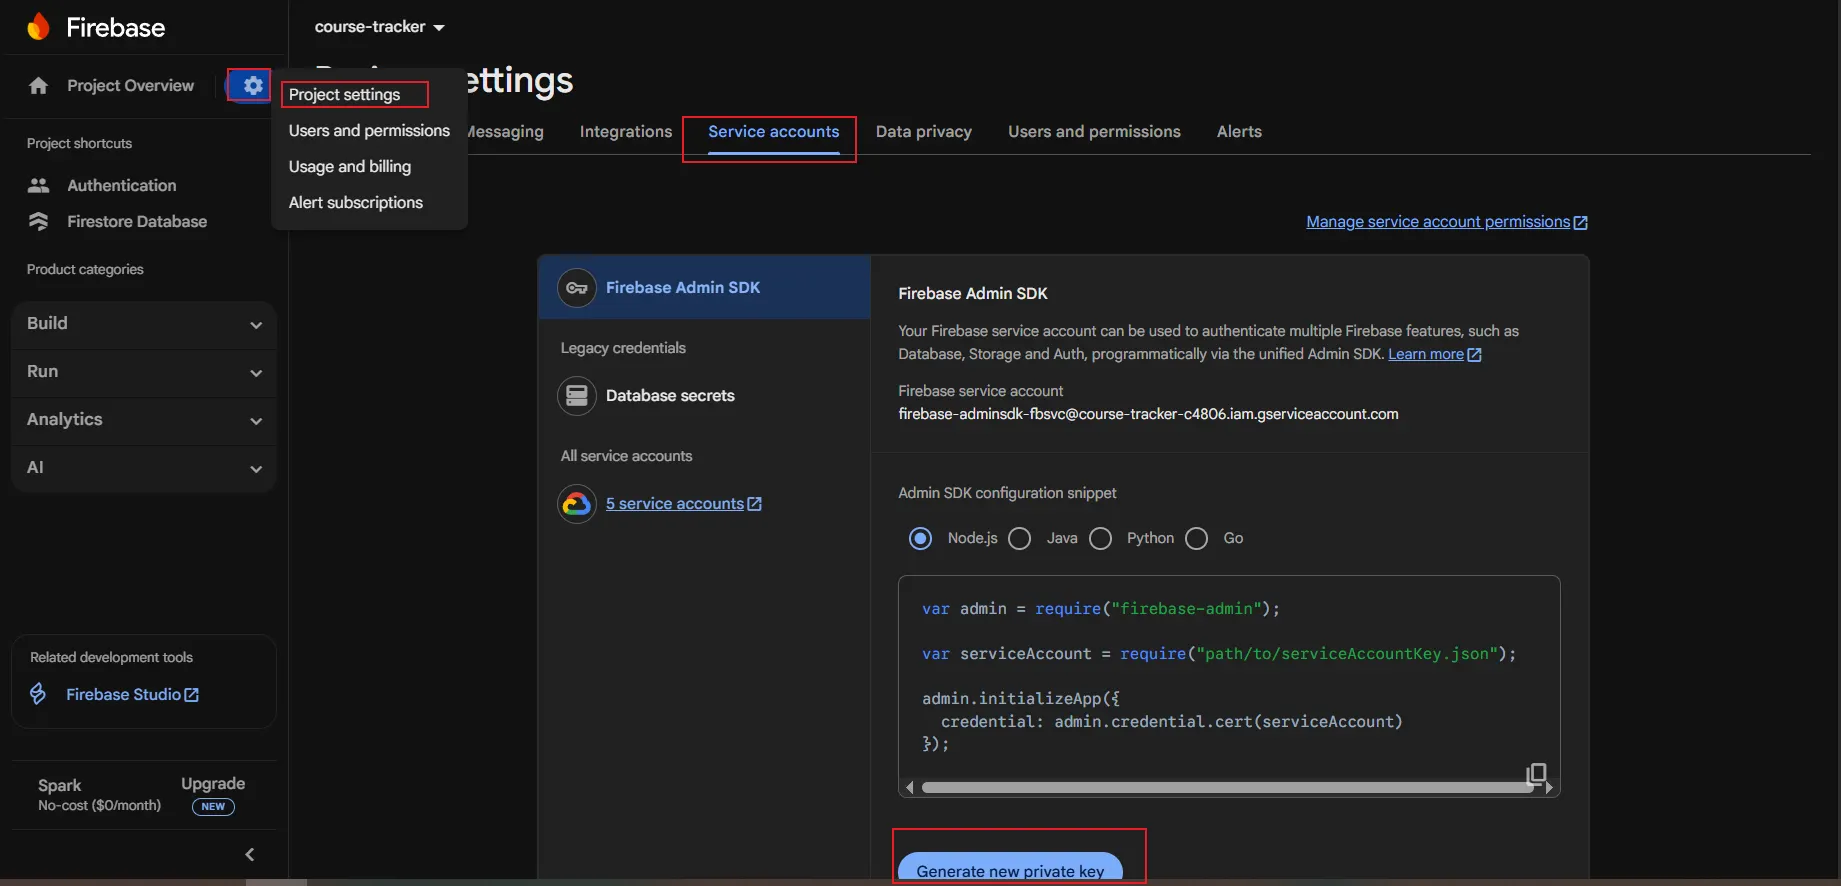
4. Set JDK admin
To perform administrative tasks from a privileged environment (like a server), you need to use the Firebase Admin SDK. This requires a service account with the necessary permissions. You can generate a private key for this service account in the project settings.
Go back to "Project settings," select the "Service accounts" tab, and then click "Generate new private key." This will download a JSON file containing your service account credentials, which you can use to initialize the Admin SDK in your server-side code (e.g., Java, Node.js, Python).
- Config the Rule
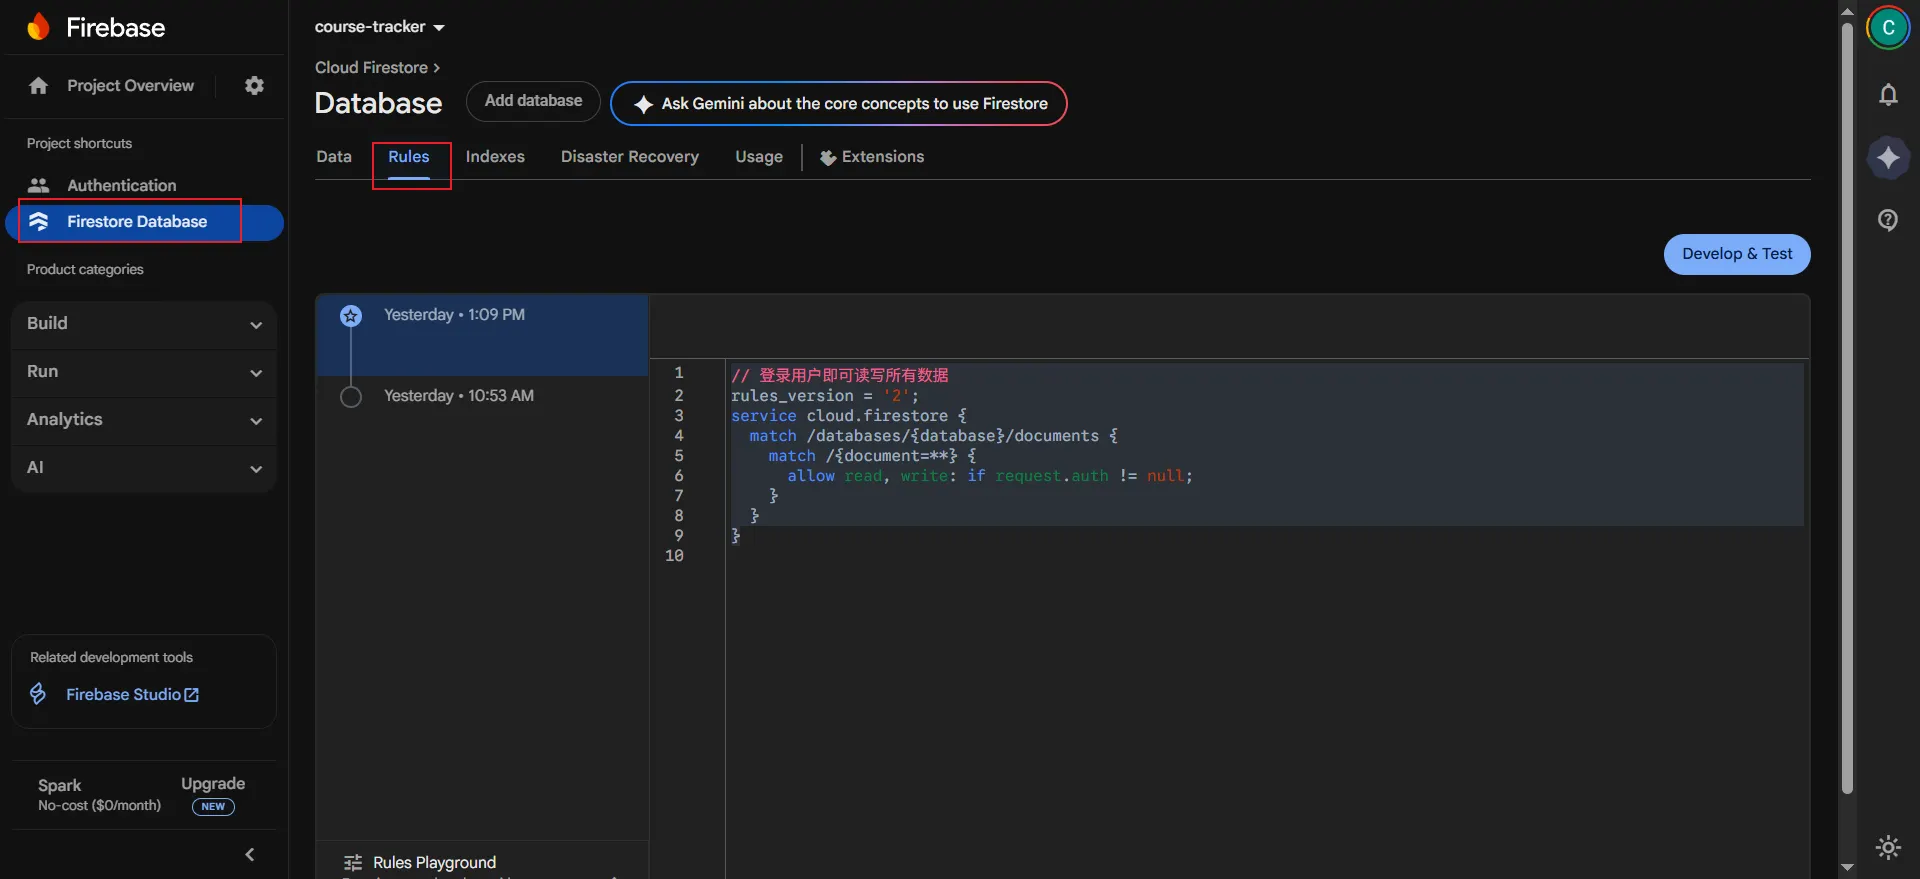
// 登录用户即可读写所有数据
rules_version = '2';
service cloud.firestore {
  match /databases/{database}/documents {
    match /{document=**} {
      allow read, write: if request.auth != null;
    }
  }
}
- 署名:在原有代码和衍生代码中,保留原作者署名及代码来源信息。
- 保留许可证:在原有代码和衍生代码中,保留Apache 2.0协议文件。
- 署名:应在使用本文档的全部或部分内容时候,注明原作者及来源信息。
- 非商业性使用:不得用于商业出版或其他任何带有商业性质的行为。如需商业使用,请联系作者。
- 相同方式共享的条件:在本文档基础上演绎、修改的作品,应当继续以知识共享署名 4.0国际许可协议进行许可。